DIY:
Recycle old T-shirt to skirt and bracelet

I was recently cleaning out my closet and I found a couple
old T-shirts that no longer fit me well. I took this as an opportunity to be
creative and fun! Since there wasn't much work to do, I thought I’d make a DIY tutorial
as well =D This is what I did with one of the T-shirts:
How to make the mini skirt

Making a skirt from your T-shirt is easier than tying your
hair up in a ponytail. All you need for this is a good pair of scissors, fabric
scissors would be best but normal ones will do fine too. First lay your T-shirt
on a flat surface and draw a line right under the neckline. If you want to be
more precise, you can fold your T-shirt in half and then draw a line on one
half (The line I drew isn't straight). Then all you have to do is cut. That’s it!
Your Mini skirt is all done. =D Wasn't that
super easy!?

My T-shirt had a print of a man’s face on the front and the
back, kind of facing each other so I wear my skirt with the seam in the middle.
This way both faces are visible. If your T-shirt doesn't have a print on it and
you would like it you, you could always use fabric paint to create your own
unique print.
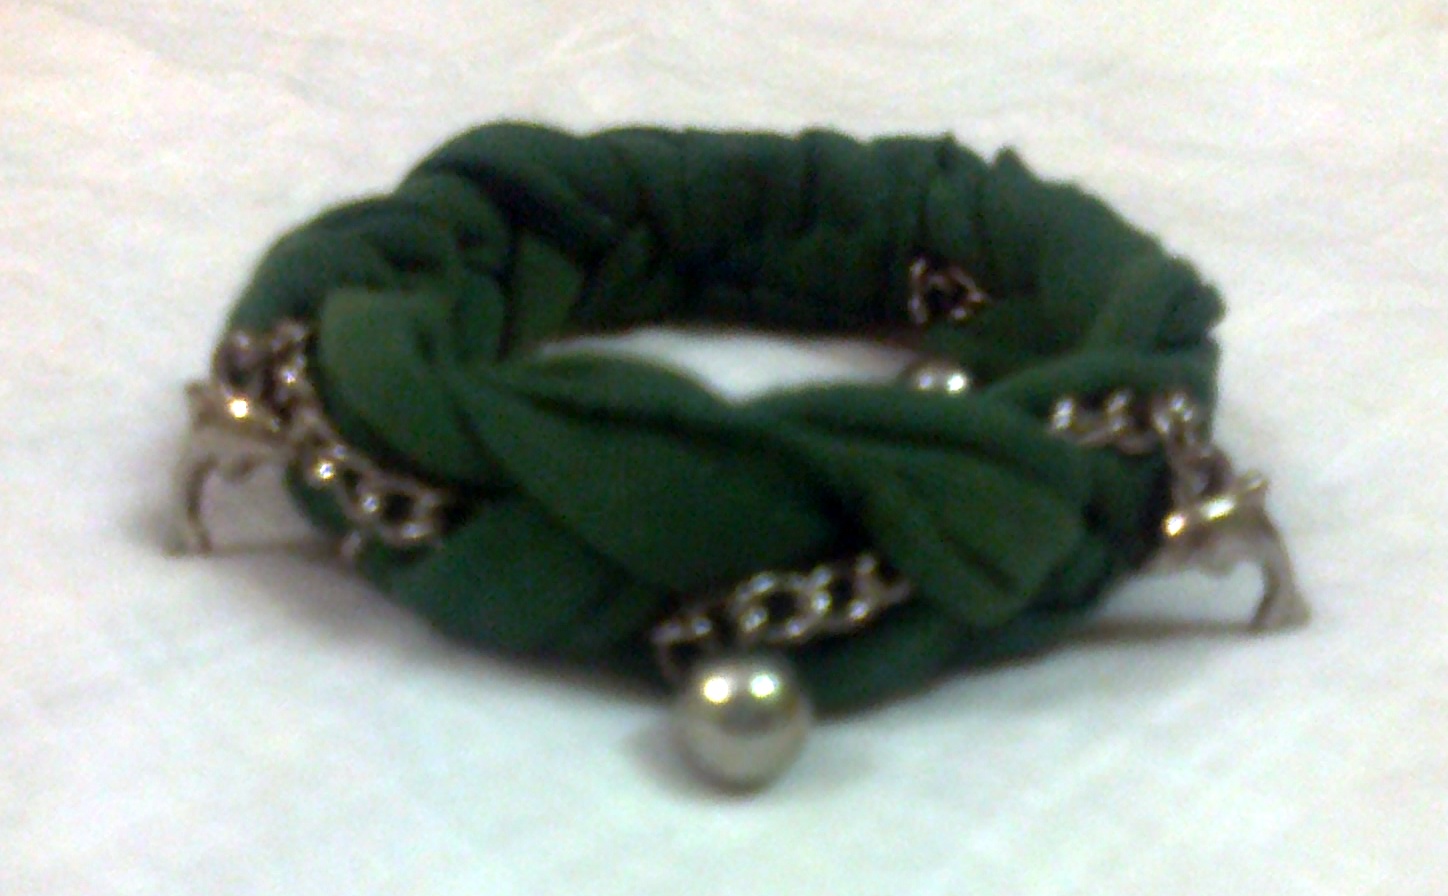
How to make the bracelet 

To make this bracelet, you’ll need:
- · Your old T-shirt
- · 1 or 2 chains or old necklaces
- · Scissors
- · Matching thread and needle
- · Sticky tape, clipboard or something to hold strands together

Firstly, cut out all the seams so that there are no sewed
together parts. This is what I was left with.

Now cut out 6 strands of approximately 1 inch/3cm and you don’t
have to be very precise while cutting them. Then pull on the ends of each
strand until they curl up and elongate a little.

Make 3 bundles each consisting of 2 strands. You can add
your chains to any bundles. I added one on each of the outside bundles. Then
tape together one end so tightly so that they won’t come loose.

Then you start braiding. If your chain has charms on it like
mine does, try to get all the charms showing on one side. Once you’re done
braid till your desired length, sew the strands together tightly to ensure that
it won’t separate. Take off the sticky tape and do the same on that end too.

Now bring together both ends and determine how big you want
your bracelet to be. Cut off the excess cloth and sew both ends firmly
together. This is most probably going to look a tad bit messy, so cover it up
with a small piece of cloth. Wrap it around the messy portion, and then invert
your bracelet so that the wrong side is outside. Bring the ends of the fabric together
and sew it securely together. Then
invert your bracelet back to normal and voilà, you’re finished!